Affordable Best IPTV Box USA with Subscription & Free Trial
Setting up an IPTV box at home sounds complicated but it really isn’t. Most people think they need some tech expert to come over and do it for them. Or they watch ten different YouTube videos and end up more confused than when they started. Truth is the whole process takes about five to ten minutes if you know what you are doing.
If you’ve been wondering how to install IPTV box USA and get everything running smoothly this guide walks you through the entire process step by step. From picking the right box to connecting it to your TV to getting your subscription activated and even grabbing a free trial before you commit.
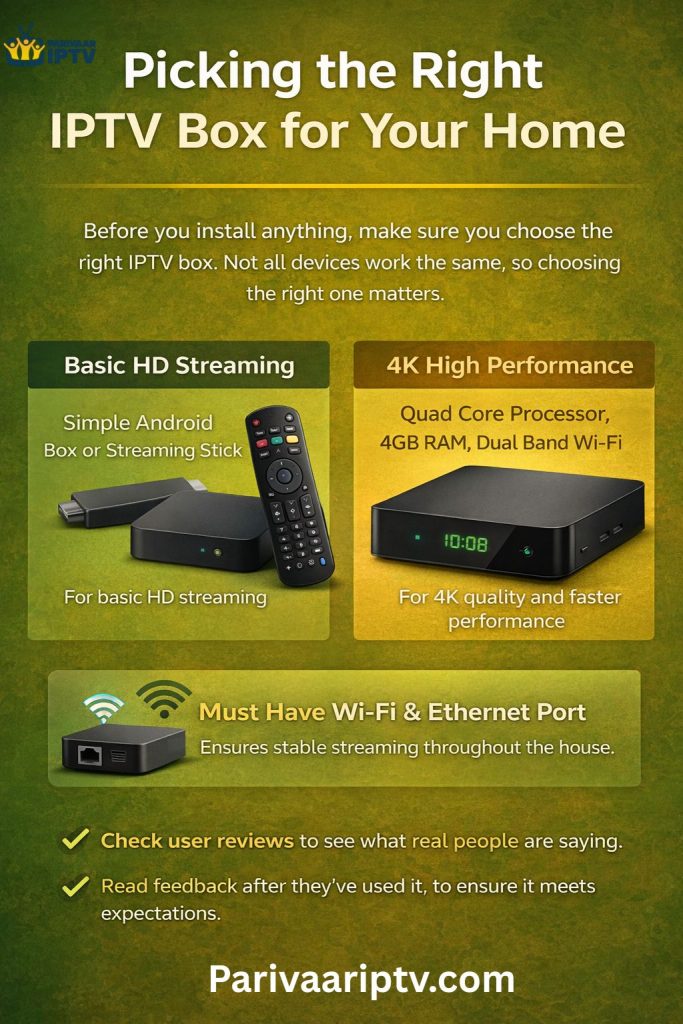
Picking the Right IPTV Box for Your Home
Before you install anything you need the right box. Not every device works the same, and picking the wrong one means frustration from day one.
The best IPTV box and subscription in USA depends on what you actually need. If you just want basic HD streaming a simple Android box or streaming stick works fine. If you want 4K quality faster performance and a device that lasts for years look at boxes with quad core processors 4GB RAM and dual band Wi-Fi support.
For families living in California or any other state make sure the device you pick has both Wi-Fi and an internet port. Internet speeds vary across different areas and neighborhoods. Having both connection options means you always get the most stable stream no matter where you are located.
Check user reviews before buying. See what real people say about the device after using it for a few months. That’s the best way to know if a box actually delivers what it promises.
What You Need Before Starting Installation
Before you start setting things up make sure you have everything ready. Nothing is worse than getting halfway through and realizing you are missing something.
You’re going to need your IPTV box obviously. An HDMI cable which usually comes included in the box. Your TV with an available HDMI port. A stable internet connection is either Wi-Fi or internet. And your IPTV subscription login details which your provider sends to your email after you sign up.
That’s it. No special tools. No extra equipment. No technician needed. Just these basics and you are good to go.
Step-by-Step Guide on How to Install IPTV Box USA
Now let’s get into the actual installation. Follow these steps and you’re going to be watching TV in no time.
- Unbox and Power Up – Take your IPTV box out of the packaging and connect the power cable. Plug one end into the box and other into a wall outlet. A small LED light should turn on showing the box got power.
- Connect to TV – Grab the HDMI cable and plug one end into your box and the other into an available HDMI port on your TV. Remember which port you used because you’re going to need to select that input.
- Switch TV Input – Turn on your TV and switch to the correct HDMI input. The box should start booting up on your screen. The first time might take a minute or two so just let it load.
- Connect to the Internet—Go to settings and find Wi-Fi. Select your home network and enter your password. If you have internet, just plug the cable from your router straight into the box and it connects automatically.
- Download IPTV App – Open the app store on your box and search for the app your provider told you to use. Download and install it.
- Log In and Start Watching – Open the app and enter the login details your provider sent to your email. Once logged in all your channels and on demand content should be right there ready to go.
That’s literally it. You just learned how to install IPTV box USA in under ten minutes.
Setting Up Your IPTV Subscription
If you don’t have a subscription yet you need to pick one before you can start watching. Most providers offer different plans to fit different budgets.
The best IPTV box and subscription in USA usually comes with monthly quarterly and yearly options. Monthly plans are good for people who want to test things out first. Yearly plans save you the most money in the long run.
Look for plans that include the channels you actually want to watch. Check if they offer HD and 4K quality. Make sure they support multiple devices if your family needs that. And confirm there’s no contract so you can cancel and walk away whenever you want without paying fees.

Getting an Affordable IPTV Box USA With Free Trial
Before spending money on a full subscription always look for an affordable IPTV box USA with free trial option. Most legit providers offer a 24 to 72 hour trial so you can test everything first without any risk.
During the trial check how fast channels load. Watch some live sports and see if there’s any lag or delay. Test the on demand library and see how big the selection is. Try it on different devices if you can. And most importantly watch during peak evening hours to see if the quality holds up when your whole house is using the internet at the same time.
A free trial takes away all the guesswork. If you like what you see, pick a plan and keep going. If not just walk away without losing a single dollar. No credit card should be required for a genuine free trial. If they ask for payment info upfront that’s a red flag.
IPTV Box USA for Indian Channels
For Indian families living in America finding good Indian content has always been a real struggle. Cable barely offers any Indian channels and the few available packages cost way too much for what you are actually getting.
An IPTV box USA for Indian channels solves this problem completely. Most IPTV services offer hundreds of Indian channels covering Hindi, Tamil, Telugu, Punjabi, Gujarati, Bengali, Marathi, Malayalam, and more. News entertainment movies, music sports devotional content and kids shows. Pretty much everything Indian families watch back home is available right here through one box and one subscription.
Whether you live in California Texas New York New Jersey Florida or anywhere else in the country an IPTV box brings the entertainment from India straight to your living room TV. The whole family gets to watch content in their own language without paying extra for separate language packages.
Tips for Getting the Best Streaming Experience
Now that you know how to install IPTV box USA here are some tips to keep things running smoothly every day.
Use a wired internet connection whenever possible. It’s always more stable than Wi-Fi and gives you less buffering during live sports and movies. If you must use Wi-Fi make sure your box connects to the 5GHz band for faster speeds and less interference.
Keep your box updated with the latest software so apps work properly and you stay protected. Restart your box once a week to clear out any junk and keep performance fresh. And make sure your internet speed is at least 15 to 25 Mbps for smooth HD and 4K streaming. If multiple people watching at the same time aim for 30 Mbps or higher.
Bottom Line
Installing an IPTV box in USA is way easier than most people think. You don’t need technical skills or professional help. Just follow the steps in this guide and you’re going to be streaming live TV movies and shows within minutes.
Pick the right box, grab an affordable IPTV box USA with free trial and test everything before committing to a paid plan. Once you see how much content you get and how little you pay compared to cable you probably never go back to the old way of watching TV.